


In this blog, we will explore the various Vray Interactive Rendering Settings and what each of the parameters means.
Interactive Rendering is a great way to set up materials, lighting & more in real-time. What do I mean real-time?
Realtime means that you get to see how your render looks as you’re changing the materials and lights.
We’ll start by showing the Settings I use in my Interactive Vray Renders.
1. Setting Up The Interactive Render
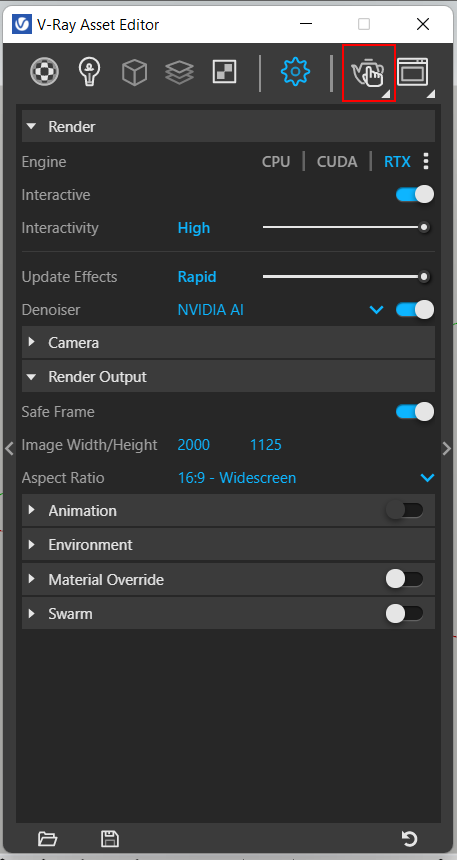
Here’s how my Interactive Render is set up since I have an RTX Graphic Card-Ready Laptop.
| Interactive | Turned On |
| Interactivity | Set to ‘High’ |
| Update Effects | Set to Rapid |
| Denoiser | Set to Nvidia Ai |
Here’s my Render Output Settings for Interactive Renders
| Safe Frame | Turned On |
| Image Width | Set to 2000px minimum |
| Aspect Ratio | Varies for the type of Render |
The above settings only work with an RTX Graphic Card enabled laptop or computer.
For Older PCs & Laptops
If you’re using an older system or Laptop, follow the below settings:
| Interactive | Turned On |
| Interactivity | Set to ‘High’ |
| Update Effects | Set to Rapid |
| Denoiser | Set to V-Ray |
| Safe Frame | Turned On |
| Image Width | Set to 800px minimum |
| Aspect Ratio | Varies for the type of Render |
2. Four Ways to run the Interactive Render
There are four ways you can run an interactive render in Vray for Sketchup – (It all gives you the same result)
- The Vray Toolbar

- The Vray Asset Editor Settings Window
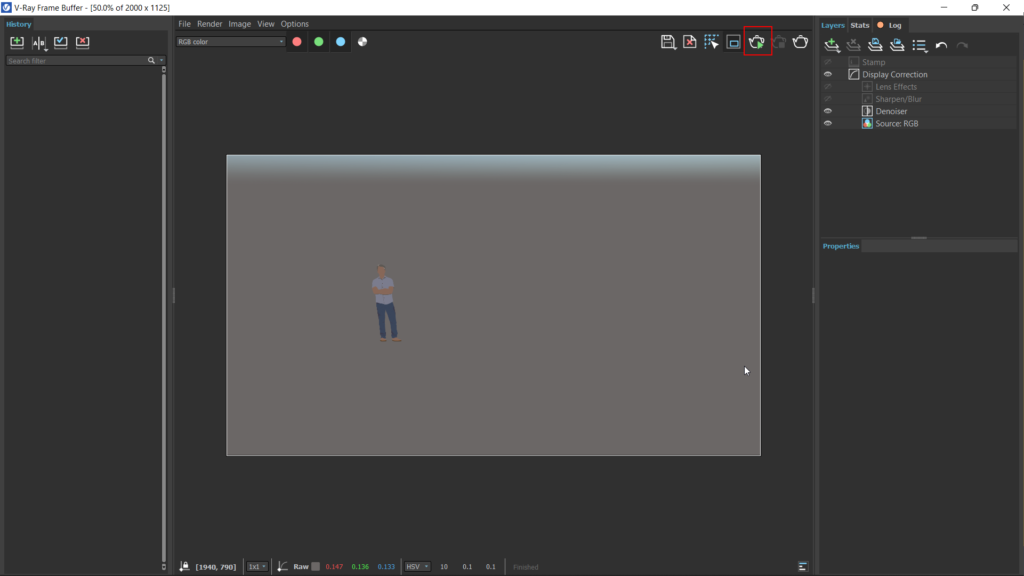
3. The VFB Interactive Render Button
I use this button a lot when I need to make changes directly within the VFB window.
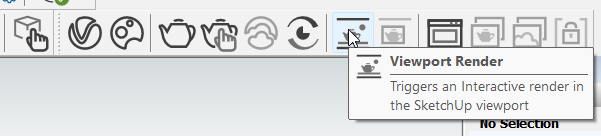
Bonus: The Sketchup Viewport Render
This is a great way to visualize your render in the Sketchup Viewport directly. The only drawback is that you will not be able to lock the camera orientation.
3. The Various Parameters of the Vray Interactive Rendering Settings
Before we go ahead with setting our interactive mode, we need to first understand the difference between CPU, GPU & CUDA Render Engines.
Once you’re done reading the above link, continue with this blog.
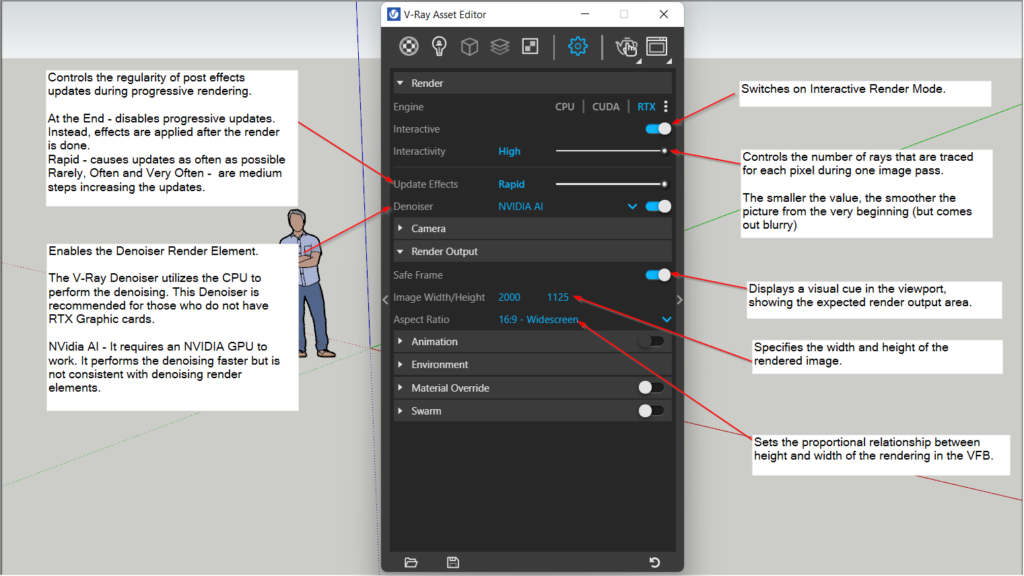
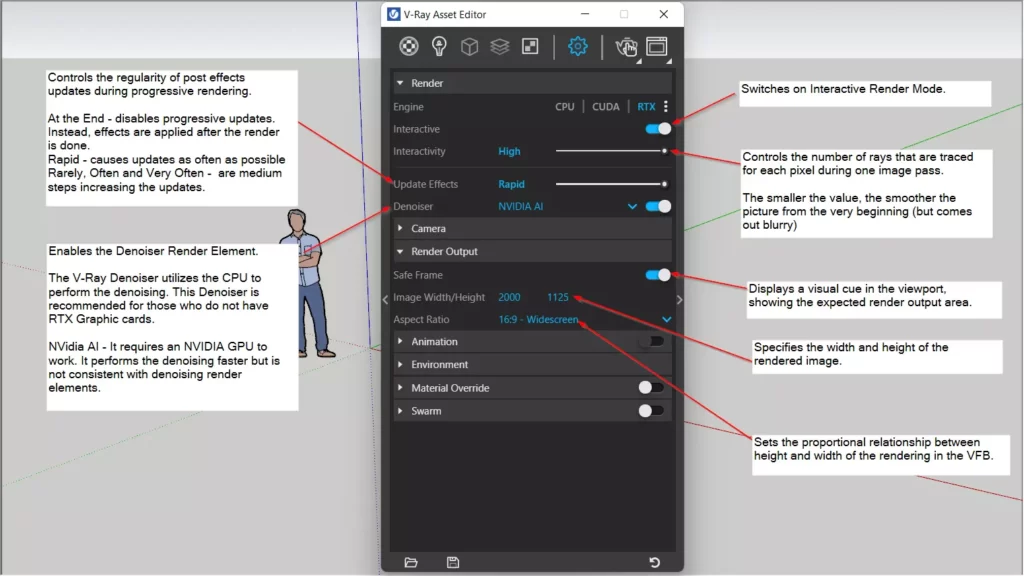
Interactive Toggle Button – Switches on Interactive Render Mode
Interactivity Slider = Controls the number of rays that are traced for each pixel during one image pass. The smaller the value, the smoother the picture from the very beginning (but can come out blurry)
Update Effects – Controls the regularity of post effects updates during progressive rendering.
At the End – disables progressive updates. Instead effects are applied after the render is done
Rapid – causes updates as often as possible
Rarely, Often & Very Often – are medium steps increasing the updates.
Denoiser Toggle – Enables the denoiser renderelement.
The V-Ray Denoiser Utilizes the CPU to perform the denoising. The Denoiser is recommended for those who do not have RTX Graphic card.
NVidia AI – It requires an NVIDIA GPU to work. It performs the denoising faster but is not consistent with denoising render elements.
4. Bonus Tip: Switch on Lock Camera Position
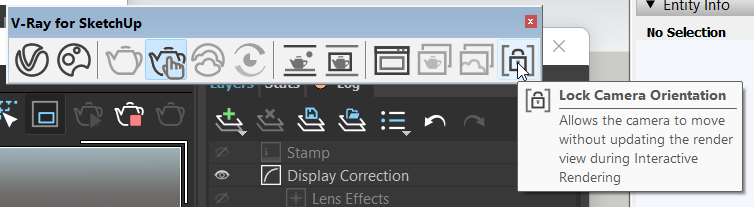
Here are the steps to lock camera
- Start the Vray Interactive Render
- Click on Lock Camera Orientation from the Vray Toolbar
This will lock your view and now when you rotate or orbit in Sketchup, it will not affect the Interactive Render in the VFB viewport.
If you would like to learn how to create photorealistic renders, do check out our premium Sketchup & Vray Course for Interior Design


