


If you are beginner at using the V-ray for SketchUp interface, you might face a few obstacles before you get it right.
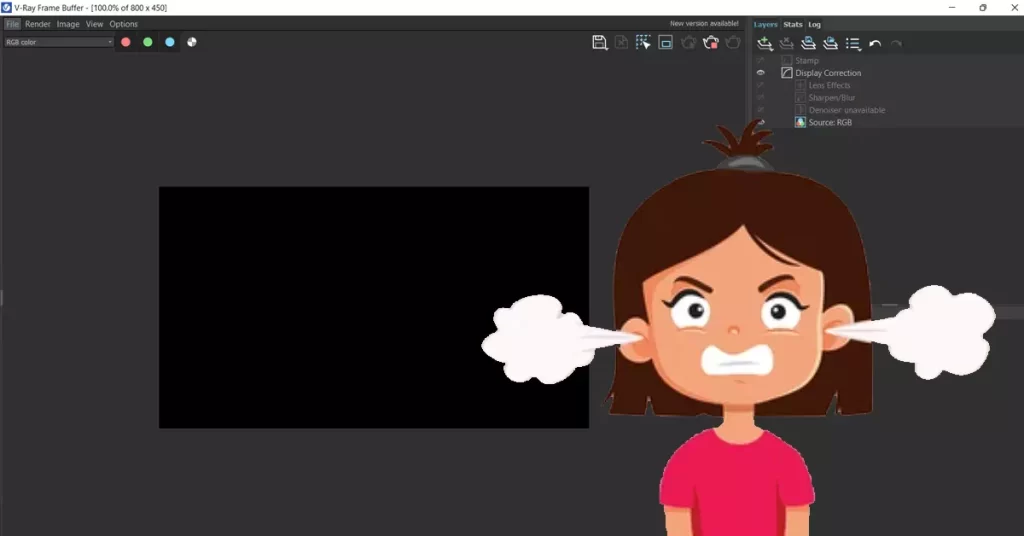
One of the most common problems is rendering out an image, only to find out that the image has rendered out completely dark or blacked out within the VFB.
Here we would like to discuss the methods/ solutions used to help you rectify the vray black render problem and thus achieve your desired rendered image.
Why does my Vray SketchUp model Render Black in the VFB
1. THE CAMERA IS OVERLAPPED WITH THE WALL
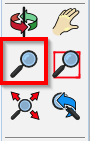
As you can see in the above image, if your camera is overlapping a wall or is placed directly against a surface, the rendered image would appear blacked out. To rectify this, one would simply need to select the zoom tool in the large tool set and scroll their mouse wheel to adjust the camera position. ( Scroll forward = Zoom In, Scroll backward = Zoom Out )
2. THERE ISN'T ENOUGH LIGHTING IN YOUR SCENE
In this case, there are a few options to help achieve the desired lighting in your scene. They are as follows;
A) Check the direction of sunlight – The direction at which sunlight falls on your model could predominantly affect the lighting in your scene. To adjust the sunlight you will have to select the shadow settings in your default tray located on the right side of your screen.
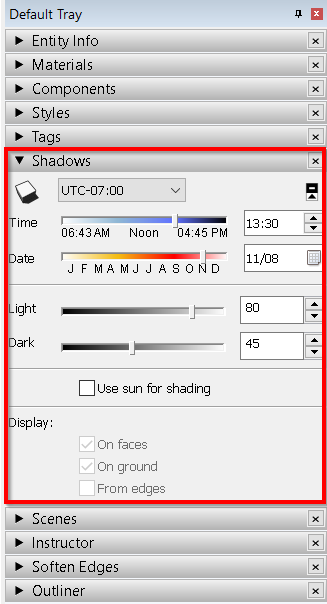
In the Shadows drop-down menu, select the shadows icon. This setting hides or displays live shadows in your scene .
You can also adjust the time of the day. This essentially determines the position of the sun during the course of a day.
The ‘Date’ tab allows you to slide the pin to position it to any month of the year. This determines the intensity of solar radiation based on the month you have selected.
B) Check Dome Light Settings (Adaptive Light) – If you’ve chosen to use a dome light setting in your model, you can turn off the sunlight and environment light settings too.
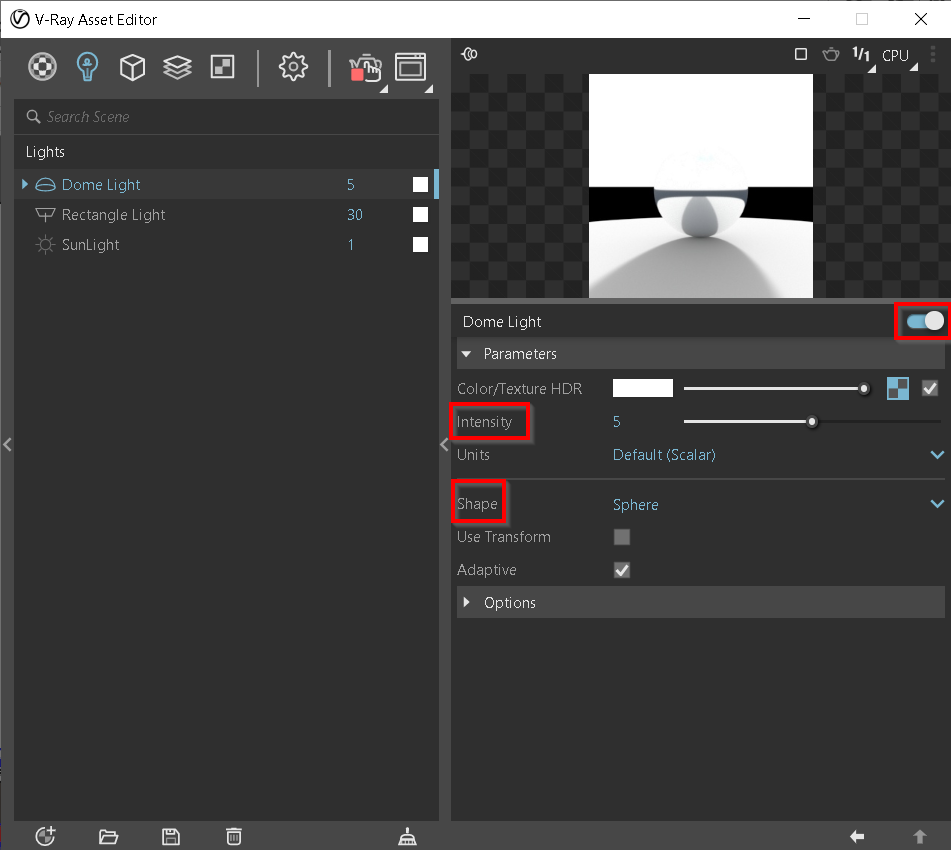
Under the dome light parameter settings you can select your desired HDRI image and increase the intensity to around 5. In addition, you can also adjust the shape of the dome light from hemisphere to sphere as shown in the image above .
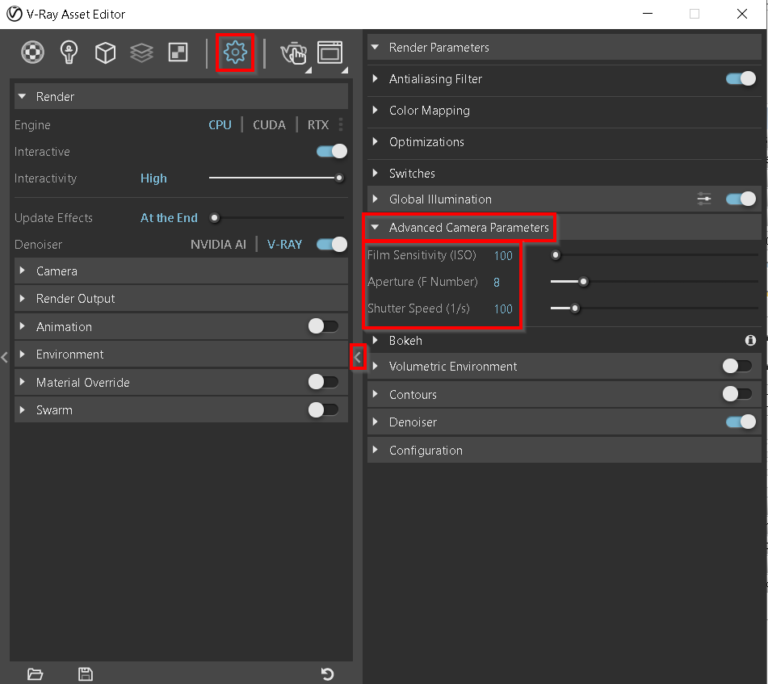
C) Check Camera Settings – Open your Material Asset Editor and under the settings tab, select ‘advance camera parameters’ and adjust the settings to the following:
film sensitivity (ISO) – 100
Aperture (F NUMBER) – 8
Shutter Speed (1/s) -100
These settings determine the sensitivity of the camera lens to the presence of light or lack of thereof.
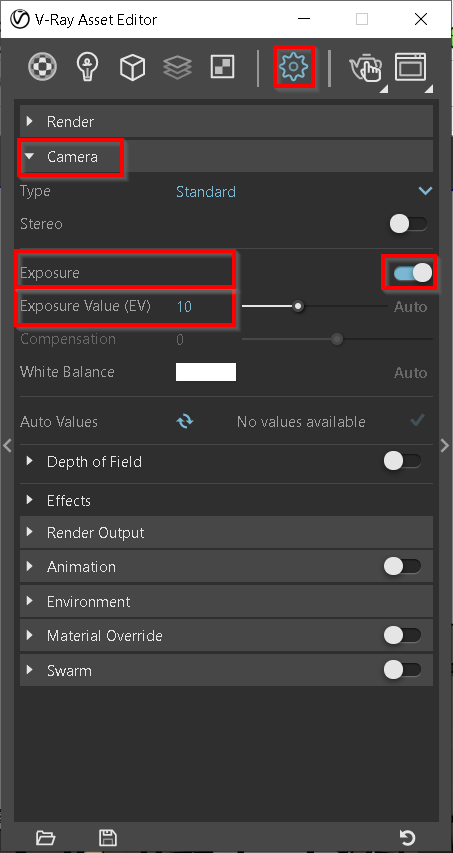
D) For interior scenes the ideal ‘Exposure Value‘ is set between 8- 10 respectively. These values can be adjusted in the ‘Camera’ tab under ‘Settings’ in the material asset editor.
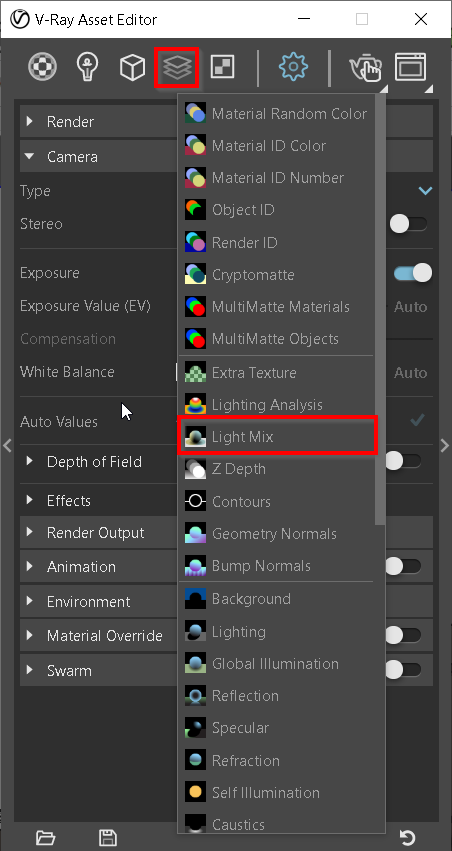
3. USE LIGHTMIX TO CHECK YOUR LIGHTS IN THE VFB
To add a ‘Light Mix‘ to your scene, follow the steps below :
Adding ‘Light Mix’ is a great time saver as it allows you to manipulate both individual and instances of light settings without having to render your scene over and over again.
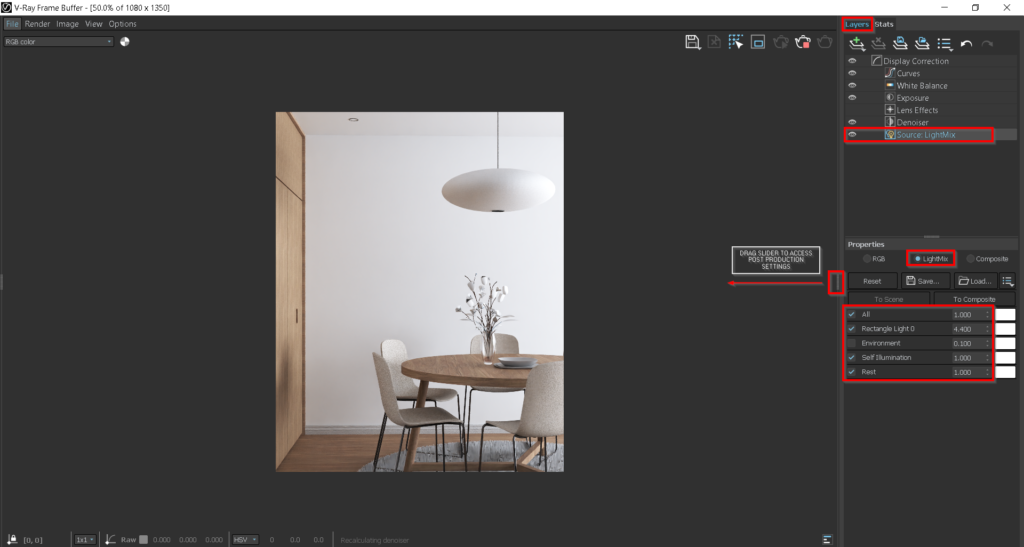
Once you’ve added the ‘LightMix’ element to your scene, you can access it in the post production settings by simply holding down and dragging the slider bar option as shown in the image above. Double-clicking the slider bar option will also open or collapse the post production settings in the VFB.
To adjust the ‘LightMix’ parameter settings, select the ‘Layers’ tab and under Source: LightMix select properties > LightMix.
Here you can adjust individual or instances of lights in your scene to best suit your desired rendered image.
4. Check the material of your glass
One of the most common problems in rendering black or darkened out images is the inapt settings of your glass materials.
Firstly, we need to make sure the glass material used in our scene has a thickness
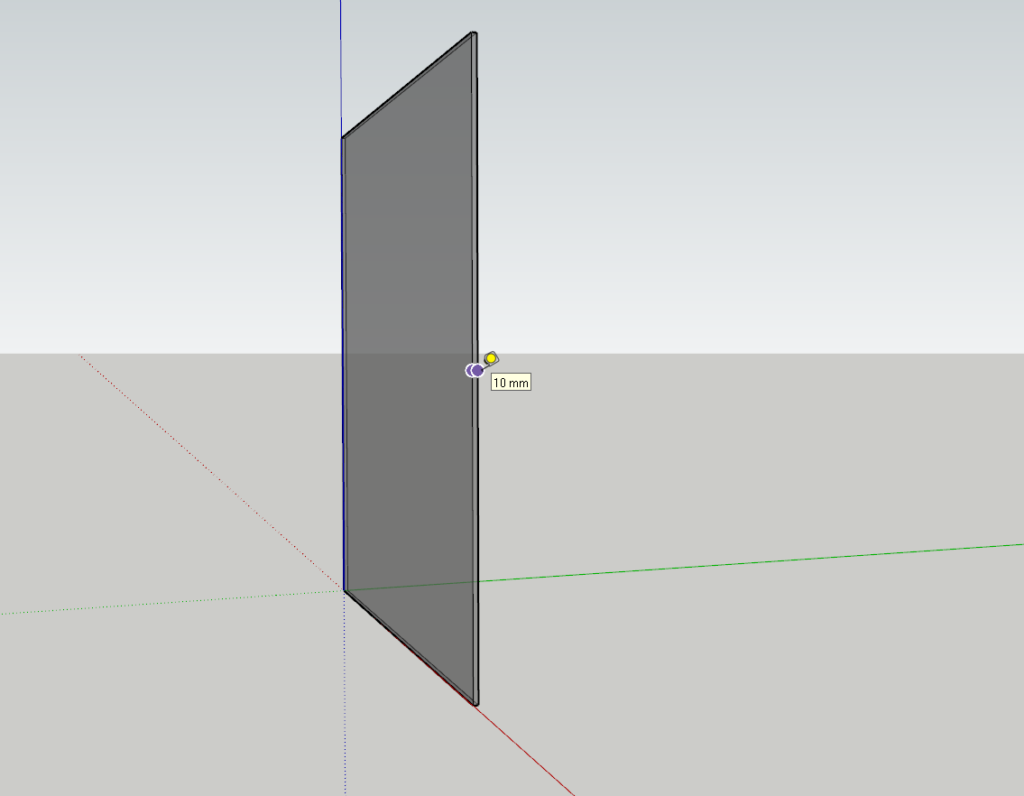
( If any model in our scene has only a single face, the material would appear to be opaque or impenetrable to light)
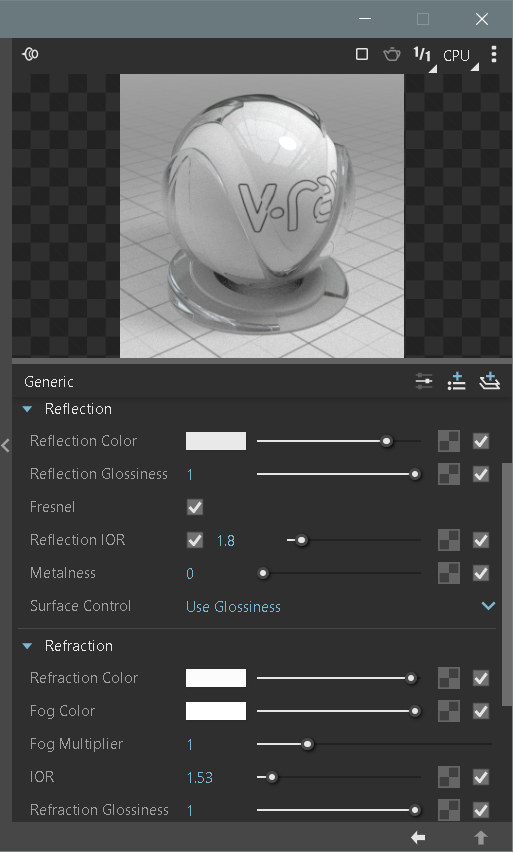
Second, after we have checked the thickness of our glass model, we can go to the v-ray material asset editor and adjust the glass material parameters.
Under the Refraction tab, make sure the IOR ( Index of Refraction) setting is set to 1.53. This describes the way light bends when passing through the particular material surface.
If you would like to get a better understanding of these parameters mean head on over to our blog on material parameters.
We hope this blog has equipped you to render more efficiently.
If you would like a detailed explanation, please do check out our premium Sketchup & Vray Course for Interior Design
Check out our other Vray blogs which you might find useful.


7 Responses
Hi Sir, I followed all these explanations but i still have the black Render issue.
What shall I do now please.
thank you,
Betty
Hi Sir, I followed all these explanations but i still have the black Render issue.
I think I found a solution (it worked with my issue)
I’m the settings of vray->render tab—> here change CUDA to CPU.
I think I found a solution (it worked with my issue)
In the settings of vray->render tab—> here change CUDA to CPU.
Hi ibitissem,
Check your shadow settings and make sure there is light falling from the window into the room.
Most students give the wrong shadow settings and experience the black render issue.
Hi Sir,
I followed all of the steps, still my render is showing black. Please help.
Sir, I followed all your guidelines but still I’m getting the black render. But while on interactive mode my render appears with lighting. I don’t know why it isn’t showing on clicking final render button ?