


Mastering Interior Design Start to Finish in SketchUp: A Comprehensive Workflow Guide
Interior design is an intricate dance of creativity, functionality, and precision. With the evolution of digital tools, designers have gained unprecedented power to bring their visions to life with unparalleled accuracy and efficiency. Among these tools, SketchUp stands out as a cornerstone of modern interior design, offering a versatile platform that empowers designers to conceptualize, design, and present interior spaces with ease.
In this comprehensive guide, we’ll delve into a complete workflow for completing an entire interior design project within SketchUp, from the initial spark of inspiration to the final flourish of presentation. By mastering SketchUp’s capabilities and integrating it seamlessly into every stage of the design process, designers can unlock new levels of creativity and efficiency, ultimately delivering exceptional results that exceed client expectations.
Phase 1: Conceptualization and Planning
The journey begins with conceptualization and planning, where designers lay the foundation for their project by gathering inspiration, understanding client requirements, and sketching out preliminary ideas.
- Gather Inspiration and Requirements:
The first step in any interior design project is to gather inspiration and understand the unique requirements of the client. This phase is all about immersing oneself in the client’s vision, preferences, and lifestyle to ensure that the final design reflects their personality and meets their practical needs. SketchUp’s 3D Warehouse is a treasure trove of inspiration, housing an extensive collection of furniture, textures, and materials that designers can explore to kickstart their creativity. By leveraging this vast library, designers can discover new ideas, experiment with different styles, and find the perfect elements to bring their vision to life.
Additionally, tools like Pinterest, Houzz, and design blogs serve as valuable sources of inspiration, allowing designers to curate mood boards, gather references, and stay up-to-date with the latest trends in interior design. By immersing themselves in a world of colors, textures, and styles, designers can fuel their creativity and ensure that their designs resonate with clients on a deeply personal level.
- Sketch Preliminary Ideas:
Once the inspiration has been gathered and client requirements have been understood, it’s time to sketch out preliminary ideas using SketchUp’s intuitive drawing tools. This phase is all about exploring different layouts, configurations, and spatial arrangements without getting bogged down by details. By allowing creativity to flow freely, designers can generate a wide range of concepts and explore multiple design directions before honing in on the perfect solution.
SketchUp’s flexible and intuitive interface makes it easy to translate ideas into rough sketches, enabling designers to experiment with different room layouts, furniture arrangements, and architectural elements. Whether it’s a cozy living room, a sleek kitchen, or a luxurious bedroom, SketchUp provides the tools designers need to bring their ideas to life in stunning detail.
Phase 2: Detailed Design
With the preliminary ideas sketched out and the design direction established, it’s time to dive into the detailed design phase, where designers bring their vision to life with precision and accuracy.
- Create a Detailed Model:
The cornerstone of any interior design project is the detailed 3D model, which serves as the virtual blueprint for the final space. Using SketchUp’s powerful modeling tools, designers can create intricate and lifelike models that accurately represent every aspect of the design, from the layout of the furniture to the placement of the light fixtures.
One of the key advantages of SketchUp is its ability to create detailed models with ease. Designers can start with a simple box and gradually add layers of detail, refining the design as they go. By paying close attention to dimensions, proportions, and scale, designers can ensure that their models accurately reflect the real-world space, allowing clients to visualize the final design with clarity and confidence.
In addition to creating the overall layout of the space, designers can use SketchUp to explore different design options, experiment with materials and finishes, and iterate on the design until it meets the client’s expectations. Whether it’s selecting the perfect sofa for the living room or choosing the right countertop for the kitchen, SketchUp provides the tools designers need to make informed decisions and create designs that delight and inspire.
- Incorporate Textures and Colors:
Once the basic structure of the model is in place, it’s time to add textures and colors to bring the design to life. SketchUp’s extensive material library provides designers with a wide range of options to choose from, including everything from wood and stone to fabric and metal. By applying realistic textures and colors to the model, designers can create a sense of depth and dimension that enhances the overall visual appeal of the design.
In addition to SketchUp’s built-in material library, designers can also import custom textures and materials to match specific design requirements. Whether it’s matching the color of a wall paint or replicating the texture of a natural stone, SketchUp provides the flexibility and versatility designers need to achieve their desired look and feel.
- Lighting and Rendering:
Lighting plays a crucial role in interior design, shaping the mood, atmosphere, and functionality of a space. With SketchUp’s built-in lighting tools and rendering plugins, designers can simulate realistic lighting effects that bring their designs to life in stunning detail.
SketchUp’s basic lighting tools allow designers to create simple light sources such as sunlight and artificial lights, while rendering plugins like V-Ray and Enscape take the realism to the next level with advanced lighting effects and photorealistic rendering capabilities. By adjusting parameters such as light intensity, color temperature, and shadow softness, designers can fine-tune the lighting to create the perfect ambiance for any space.
Phase 3: Documentation and Presentation
With the detailed design finalized and the virtual space brought to life, it’s time to create comprehensive documentation and stunning presentations that showcase the design in all its glory.
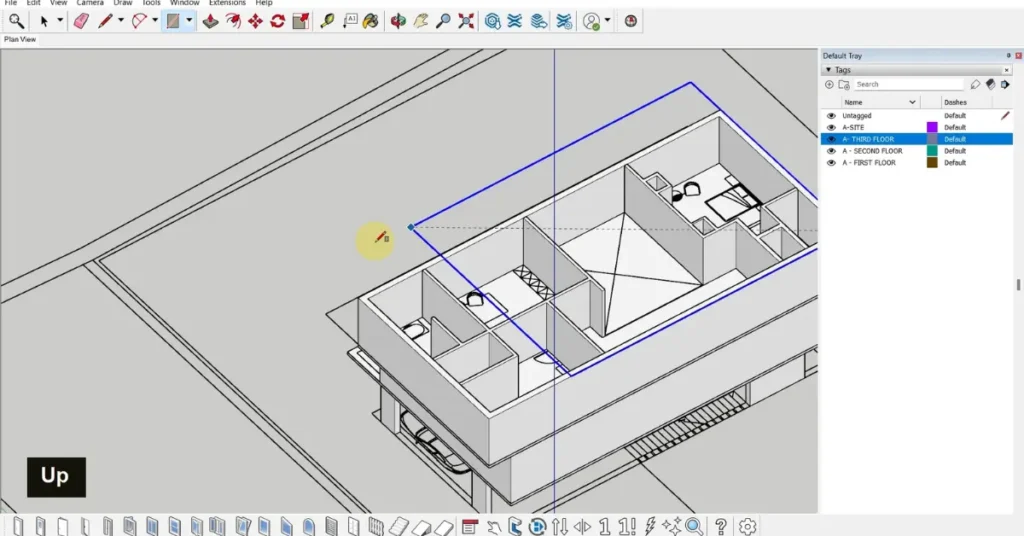
- Set Up Scenes:
Scenes are a powerful feature in SketchUp that allow designers to save and organize different views of their model. Whether it’s a top-down floor plan, a 3D perspective view, or a detailed elevation drawing, scenes enable designers to showcase the design from multiple angles and perspectives, providing clients with a comprehensive understanding of the space.
By setting up scenes strategically, designers can highlight key features of the design, emphasize important details, and tell a compelling visual story that captures the essence of the project. Whether it’s highlighting the flow of the space, showcasing specific design elements, or illustrating how natural light interacts with the environment, scenes are an invaluable tool for creating engaging and informative presentations.
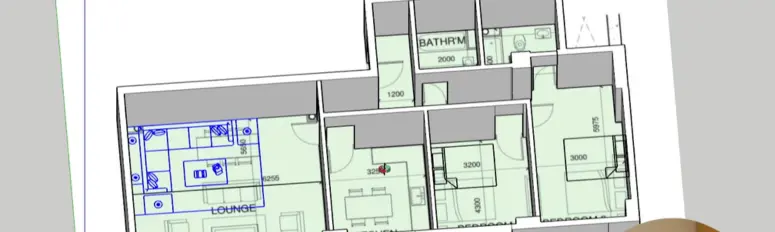
- Generate Documentation in LayOut:
Once the scenes have been set up, designers can export their SketchUp model to LayOut, SketchUp’s companion software for creating detailed documentation and presentations. LayOut allows designers to create professional-looking drawings, annotate dimensions, and add title blocks, providing clients with a comprehensive design package that includes everything they need to bring the design to life.
In LayOut, designers can arrange scenes on multiple pages, add annotations and labels, and customize the layout to suit their specific needs. Whether it’s creating detailed floor plans, elevation drawings, or construction documents, LayOut provides the tools designers need to create accurate and informative documentation that meets industry standards and client expectations.
- Create Visual Presentations:
In addition to creating detailed documentation, designers can use SketchUp’s rendering plugins to generate high-quality images and animations that bring their designs to life in stunning detail. Whether it’s a photorealistic rendering of the interior space or a dynamic walkthrough animation that guides viewers through the design, visual presentations are a powerful tool for captivating clients and stakeholders and communicating the design intent effectively.
Visual presentations serve as a bridge between the designer’s vision and the client’s understanding, offering a glimpse into the future space and allowing stakeholders to envision themselves within it. With SketchUp’s rendering plugins, such as V-Ray or Enscape, designers can achieve breathtaking visualizations that not only showcase the aesthetic qualities of the design but also convey its atmosphere and functionality.
By integrating high-quality renderings and animations into their presentations, designers can evoke emotional responses, highlight key design features, and communicate complex ideas with clarity and impact. Whether it’s conveying the warmth of natural light streaming through a window, the luxurious texture of a velvet sofa, or the seamless flow of space from one room to the next, visual presentations enable designers to tell a compelling story that resonates with clients and stakeholders on a deep and personal level.
Phase 4: Collaboration and Revision
Collaboration is an essential aspect of the design process, allowing designers to gather feedback, iterate on their designs, and ensure that the final result meets the needs and expectations of all stakeholders.
- Share with Clients and Collaborators:
SketchUp’s cloud-based platform, Trimble Connect, provides a seamless and secure way for designers to share their models with clients and collaborators, enabling efficient collaboration and feedback collection. By uploading their models to Trimble Connect, designers can invite clients and stakeholders to view and interact with the design in real-time, providing them with the opportunity to explore the space, ask questions, and provide feedback directly within the model.
This collaborative approach fosters open communication, promotes transparency, and ensures that everyone involved in the project is on the same page. Whether it’s discussing design options, addressing concerns, or making decisions about materials and finishes, Trimble Connect facilitates productive conversations that drive the project forward and ultimately lead to better outcomes.
- Iterate Based on Feedback:
Once feedback has been collected, designers can use SketchUp’s flexibility to iterate on their designs quickly and efficiently. Whether it’s making minor adjustments to the layout, refining the selection of materials, or tweaking the lighting settings, SketchUp’s intuitive interface makes it easy to implement changes and see the results in real-time.
By involving clients and stakeholders in the iterative process, designers can ensure that their designs evolve in response to feedback and ultimately meet the needs and expectations of all parties involved. This collaborative approach not only leads to better design outcomes but also fosters a sense of ownership and investment in the project, resulting in greater satisfaction and success for everyone involved.
Phase 5: Finalization and Implementation
As the project nears completion, designers focus on finalizing their designs and preparing for implementation, ensuring that every detail is meticulously planned and executed to perfection.
- Finalize Design and Documentation:
In this final phase, designers incorporate all feedback and make any last-minute adjustments to their designs to ensure that they are polished and refined. Whether it’s fine-tuning the layout, updating the materials palette, or finalizing the lighting scheme, designers strive to achieve a perfect balance between form and function, aesthetics and practicality.
In addition to finalizing the design itself, designers also ensure that their documentation is detailed, accurate, and comprehensive. Whether it’s updating floor plans, elevations, or construction drawings, designers use LayOut to create professional-looking documents that provide contractors and stakeholders with everything they need to bring the design to life.
- Prepare for Implementation:
With the design finalized and the documentation complete, designers turn their attention to preparing for implementation. This involves coordinating with contractors, ordering materials, and ensuring that everything is in place for construction to begin.
SketchUp models play a crucial role in this phase, serving as valuable tools for clarifying complex details, communicating design intentions, and guiding the implementation process. Whether it’s using the model to coordinate with contractors, resolve conflicts, or make on-the-fly adjustments, designers rely on SketchUp to ensure that the vision for the space is realized with precision and accuracy.
Conclusion: Streamlining Interior Design with SketchUp
In conclusion, mastering SketchUp empowers interior designers to streamline their workflow, from initial concept to final implementation. By leveraging SketchUp’s versatile tools and integrations, designers can create designs that are not only beautiful and inspiring but also functional and practical.
From gathering inspiration and sketching preliminary ideas to creating detailed models and presenting designs to clients, SketchUp provides the tools designers need to bring their visions to life with precision and creativity. By embracing digital tools and adopting a collaborative approach to design, designers can ensure that their projects are successful, satisfying, and ultimately transformative for both clients and stakeholders alike.
As the field of interior design continues to evolve, mastering SketchUp positions designers at the forefront of innovation, equipped with the skills and tools they need to shape the future of design and create spaces that enrich the lives of those who inhabit them. With SketchUp as their ally, designers can unlock new levels of creativity, efficiency, and success, ultimately achieving their goals and exceeding their clients’ expectations with confidence and flair.


