


In this blog, we would like give you an over-view of the Vray material parameters and how to create Vray Materials in Sketchup.
What are V-ray Materials ?
V–Ray Materials are the main workhorses for creating life-like materials in V–Ray. 80% of the time it is all you need to create realistic results that also render quite fast. It is optimized to work with all other aspects of V–Ray (lights, GI, sampling, etc.)
How to create a V-ray Material ?
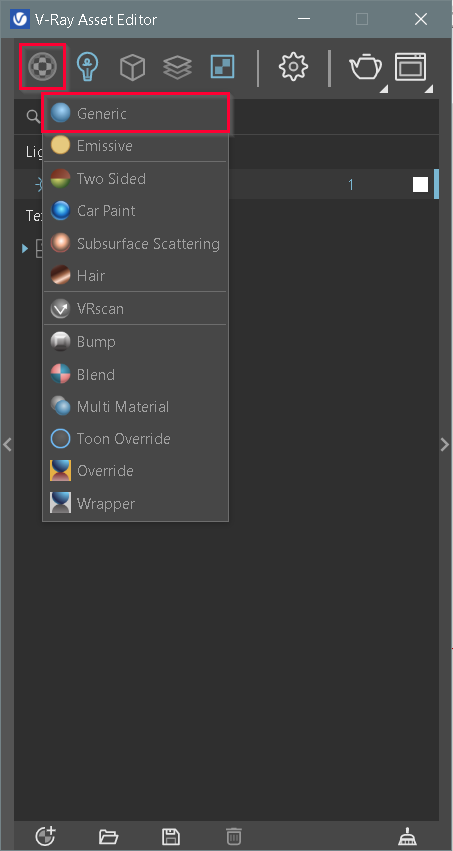
Once you have your material asset editor opened, you will see a list of options at the top of the menu bar ( as shown in the image)
Selecting the ‘Materials’ Icon would give you a drop down of the different types of materials you can create but lets focus on creating a generic material first (baby steps)
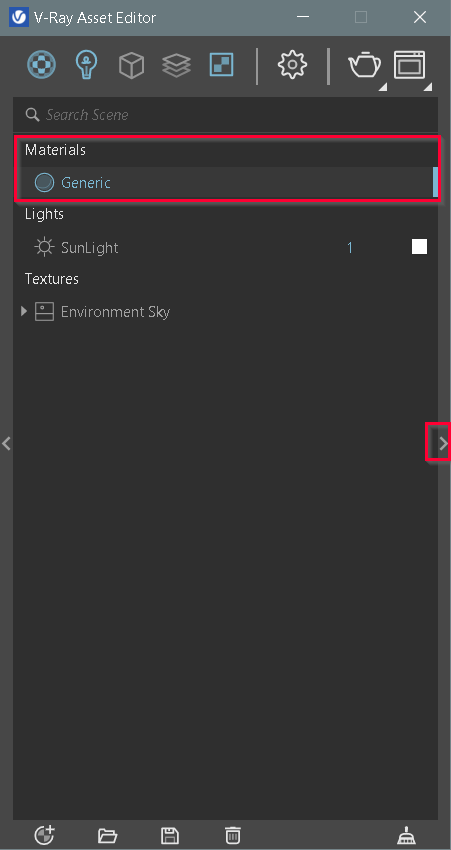
Once you have selected the ‘Generic’ option it would show up under the materials tab.
Congrats! And just like that you have created your first material! (give yourself a pat on the back)
Now that you’ve created your first material, we can tweak its settings to give it a more desirable look but first lets gain a better understanding of what each of the V-ray material parameters denote.
To access these material parameters you need to simply click on the sliding bar option on the right side of main asset editor menu (as shown in the image below).
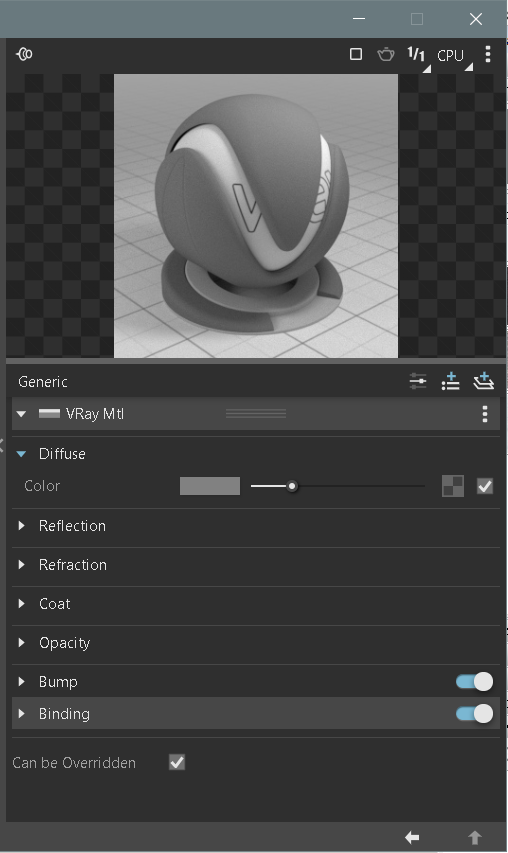
Selecting the V-ray material tab gives you a rollout of option settings which are used to tweak your materials . They are as follows:
1.Diffuse
It allows you to select the diffuse color of the given material by either selecting the color or choosing a textured map.
2. Reflection
Enables a reflection for your current material.
3. Refraction
Determines the way light passes through a specified material. Adjusting the settings under this tab allows for the material to either be opaque or translucent.
4. Coat
Adds a coat layer to the specified material
5. Opacity
Specifies how opaque or transparent the material is. A texture map can be assigned to this channel.
6. Bump
The bump map assists by creating an illusionary bump to a given surface. Thus adding a more realistic look to the material.
7. Binding
Enables connection/binding between V-Ray and Sketchup materials.
We hope you have got a better understanding of the v-ray material parameters.
If you would like a more detailed explanation on the v-ray material parameters and much more, check out our Sketchup & Vray Course for Interior Designers.
If you found this blog useful, check out our other blogs on Vray.


