


When we think about Sketchup, we only think box and rigid forms. But when we use certain plugins like SubD, Clothworks and so on, we can extend the functionality of sketchup and start creating fluidic forms.
In this Blog, we demonstrate how to create a blanket using the clothworks plugin in Sketchup.
So Let’s get right into it !
1. Make a Rectangle above Mattress
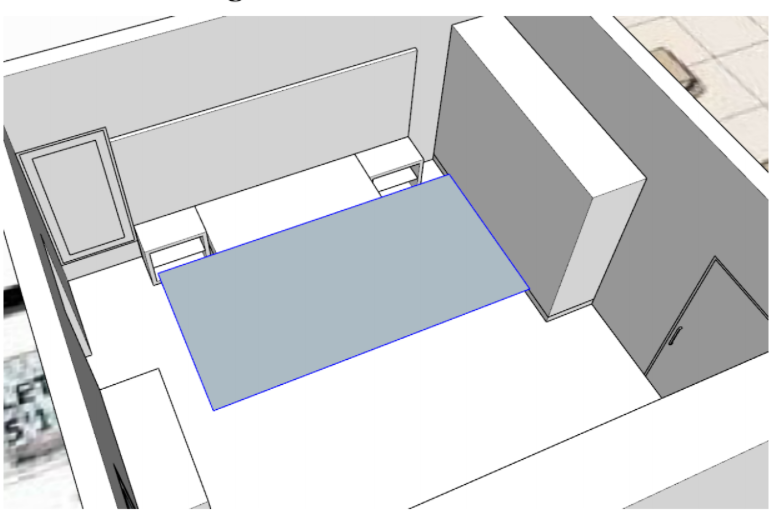
I have given a blanket size bigger than the bed so that it wraps around on all sides and drops to the floor.
It’s also important to make your rectangle a group before proceeding further.
2. Make your Rectangle Group a Cloth.
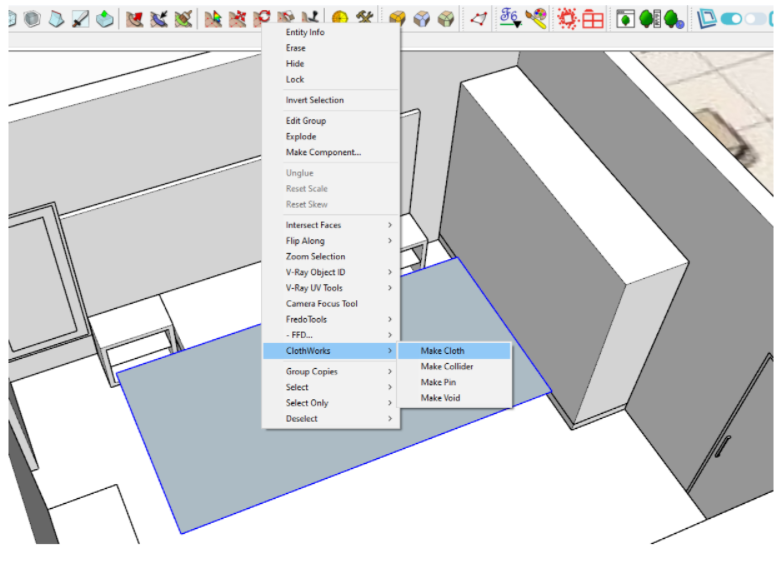
Right Click on Group > Clothworks > Make Cloth
The Clothworks option will only show up when you right click on the group.
If you enter the group and right click on the face, it will not show up. So make sure you’re right clicking from outside the group.
3. Apply Quadrilateral Grid
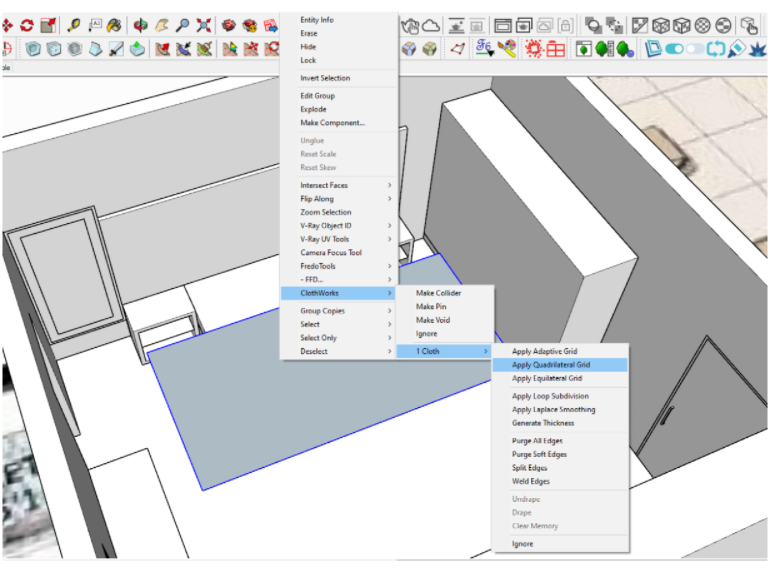
In this blog, I apply Adaptive Grid. But Adaptive Grid, movable pins, loop subdivision, and Laplacian smoothing don’t work in the trial version of Clothworks.
Alternatively you can use Quadrilateral grid to subdivide
the surface and give a resolution of 3000.
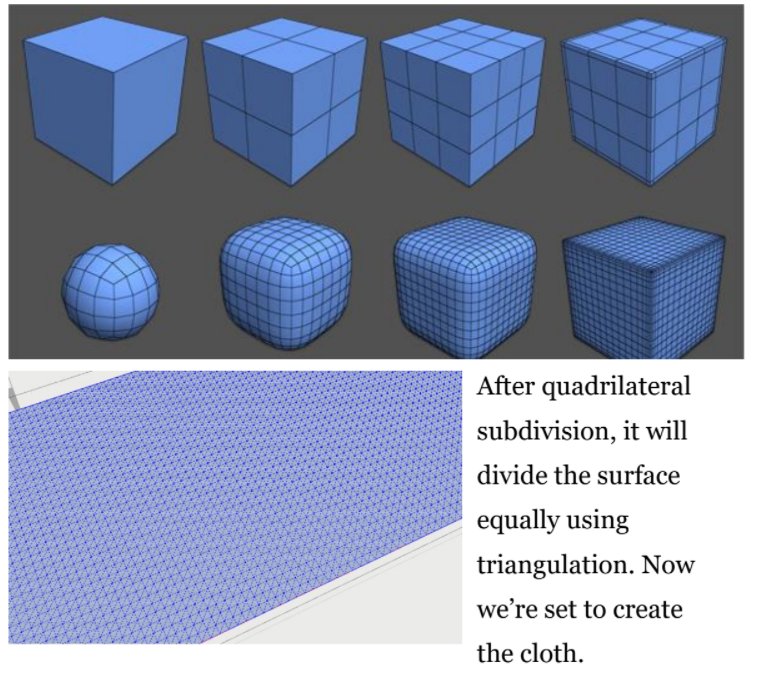
Subdivision is important in creating any kind of cloth material.
This is a modeling technique for making high-resolution models, by manipulating a lower-resolution “cage” model and using software to subdivide for a smoother surface.
Subdividing increases the number of vertices on the model, making curves more rounded. Usually each subdivision level increases the vertex count 4x the original count.
4. Make the Mattress & Floor a Collider
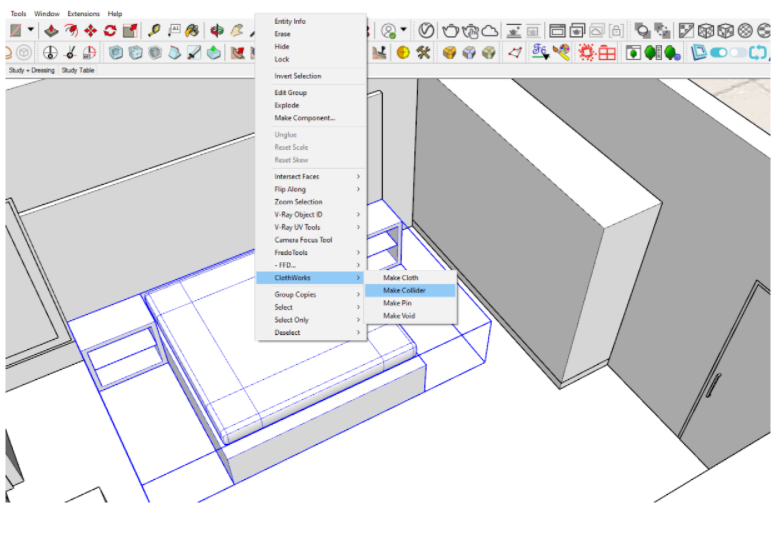
Make sure to make the mattress a Collider as well as the floor.
You can similarly try this method for Table Cloth and make
the Table a collider and a rectangle above it (subdivided) a
cloth before proceeding.
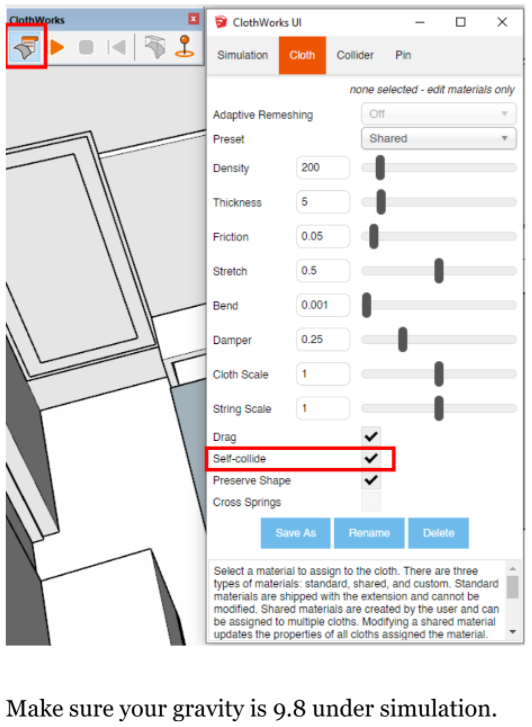
5. Switch on Self-Collide in Clothworks Settings
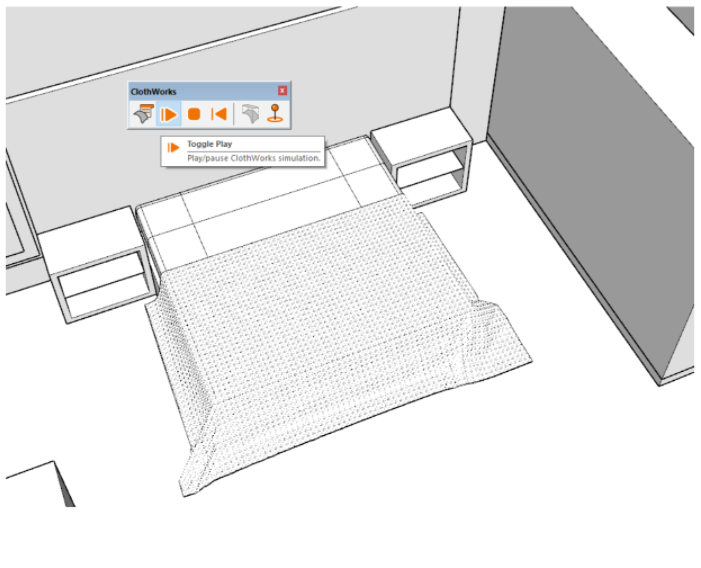
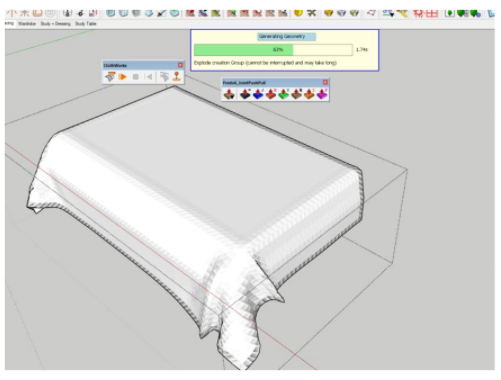
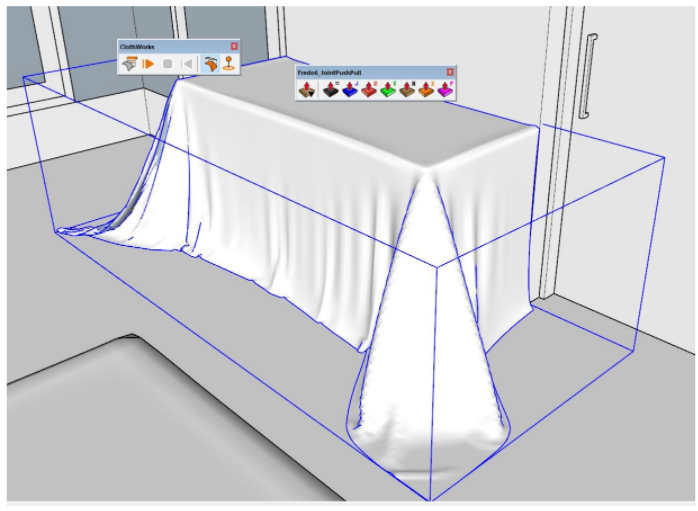
6. Run the Simulation
7. Generate Thickness
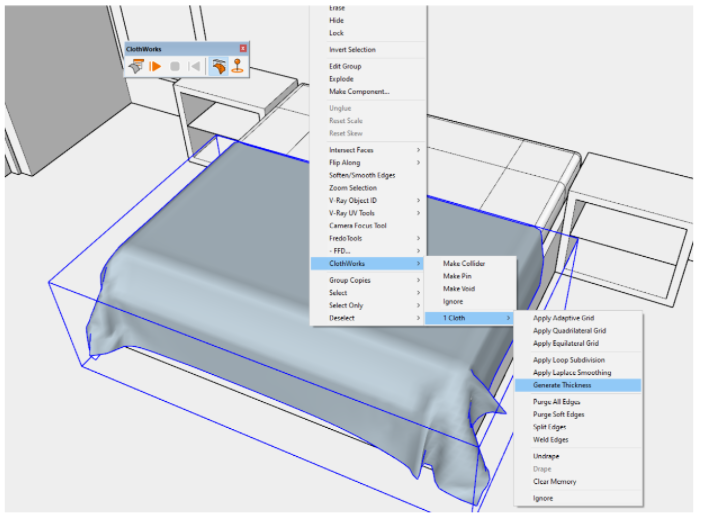
If you have the full version, you can use the Clothworks “Generate Thickness” feature to create a thickness for the blanket.
The other way, to create thickness is using the joint push pull tool.
9. Generate Thickness using Joint Push Pull Tool

Select the face of the group and click on the Joint Push Pull tool.
Now hover over the side you want to give the thickness to and type in your offset
amount. A good offset amount is around 2mm-5mm.
10. You’ve just created your blanket! AWESOME!
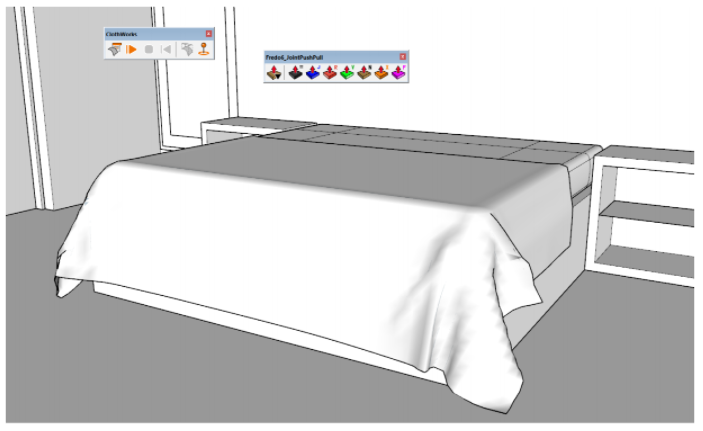
This is how we create blankets using the Clothworks Plugin. You will be able to create realistic blankets, table cloths, and more using the above steps.
I created a tablecloth using the above steps too.
We hope you found this above tutorial helpful. If you would like more such content, head on over to our website
If you’d like to learn how to create a pillow, check out our blog on how to create pillows.


